Default Encounter Sections
Standard exam encounters and encounter templates include the sections described on this page.
The encounter type determines which sections display in an encounter and the data fields within the sections.
Encounter types are managed by Vetspire. Submit a ticket to request a new encounter type for your practice.
The encounter type determines which sections display in an encounter and the data fields within the sections.
Go to More > Admin > Configure > Encounter Types to build an encounter template.
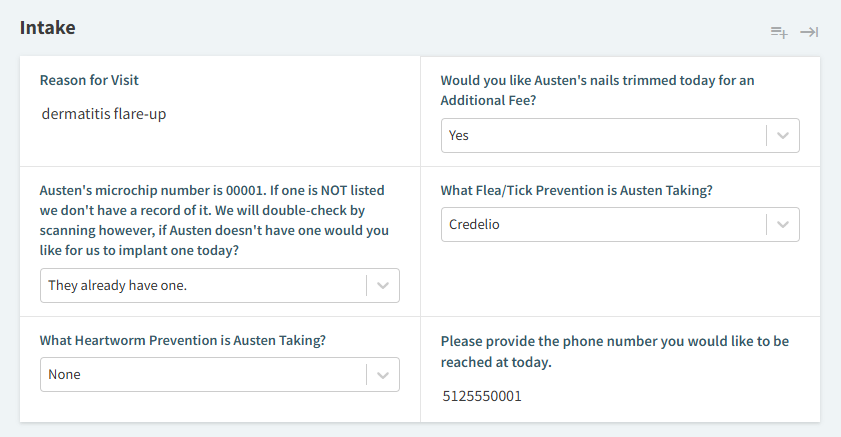
Intake
The Intake section displays the same data fields as the self check-in form that you can send to clients (via email or SMS) prior to the start of their appointment.
If the client does not receive or complete their self check-in form, the Intake fields can be completed manually during the encounter.
Example:
Vitals
The Vitals section displays historical vitals measurements for up to five previous encounters.
Example:

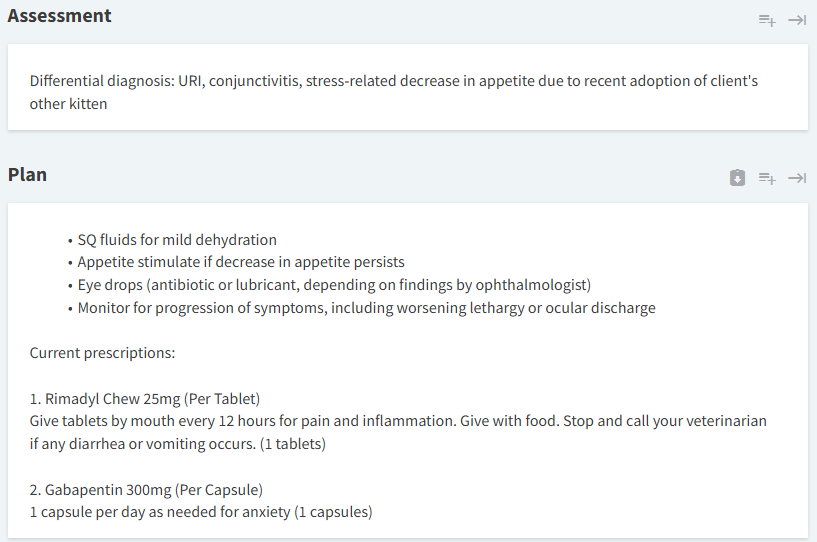
SOAP Notes
Exam encounters typically include separate sections for Subjective, Objective, Assessment, and Plan notes. For ease of use, these sections often display next to each other in the encounter template.
Subjective: Note any observations by the client, provider, or technician and information not recorded in the Intake section, such as the client’s verbal expression of symptoms. Subjective observations are not measurable.

Objective: Record all observations and measurements from the physical exam, or mark areas as Not Examined.

Assessment: Note the DVM’s tentative diagnosis based on the subjective and objective findings.
Plan: Record the patient’s treatment plan and any notes from client discussion. Select the Copy Medications ![]() button to bring forward the patient’s prescription information from their chart.
button to bring forward the patient’s prescription information from their chart.
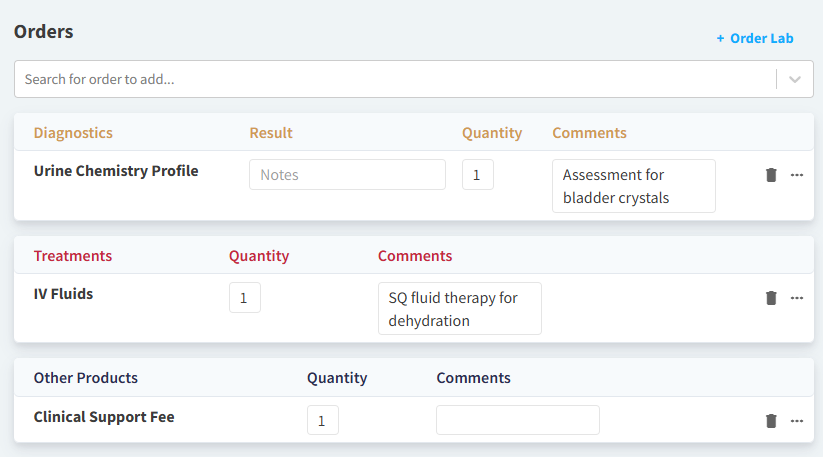
Orders
The Orders section lists all billable items associated with the encounter, categorized according to your organization’s product types (configured in Financials > Manage > Types).
In the search field, enter the name of the product as it displays in your Vetspire Inventory & Services settings.
Products and services added in the Orders section automatically populate the encounter Invoice.
Example:
Vetspire Recommends
Add all billable items through the Orders section of the encounter. Do not create a new invoice from Patient Chart > Billing for the encounter, as it will not be linked to an encounter.
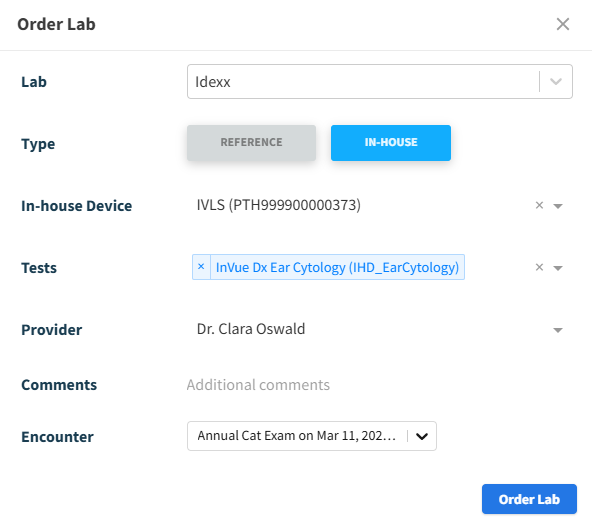
Order Lab
To order a diagnostic test from an in-house or reference lab, select + Order Lab in the Orders section of the encounter. Select your integration in the Lab field, then complete other details in the Order Lab window as needed.
Example:
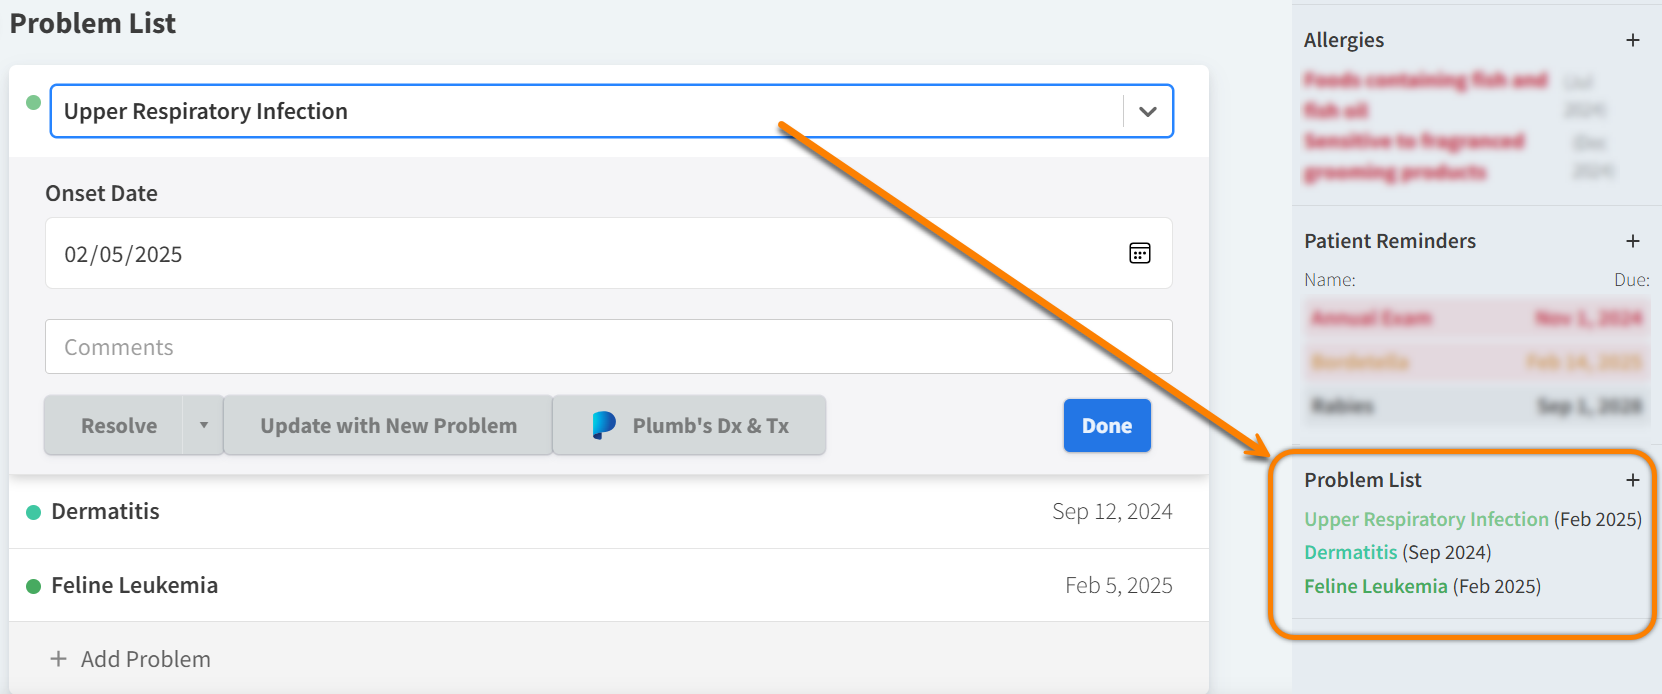
Problem List
The Problem List section displays the same issues and ailments listed in the right panel of Patient Chart.
Any new problems added in the encounter are then added to the Problem List in the right panel. From the encounter, you can also update and resolve existing problems.
Example:
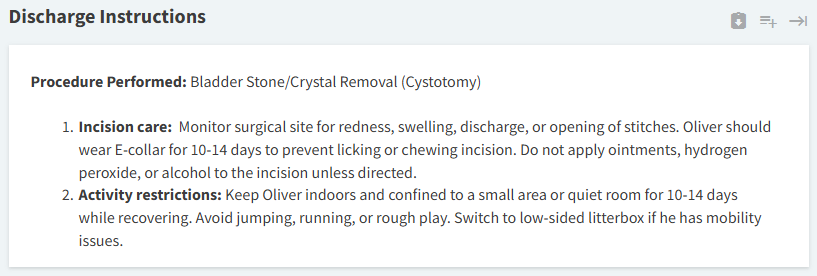
Discharge
In the Discharge section, enter information to educate the client about their pet’s procedure, diagnosis, or condition.
Like in the Plan section, you can select the Copy Medications button to bring forward the patient’s prescription information.
Example:
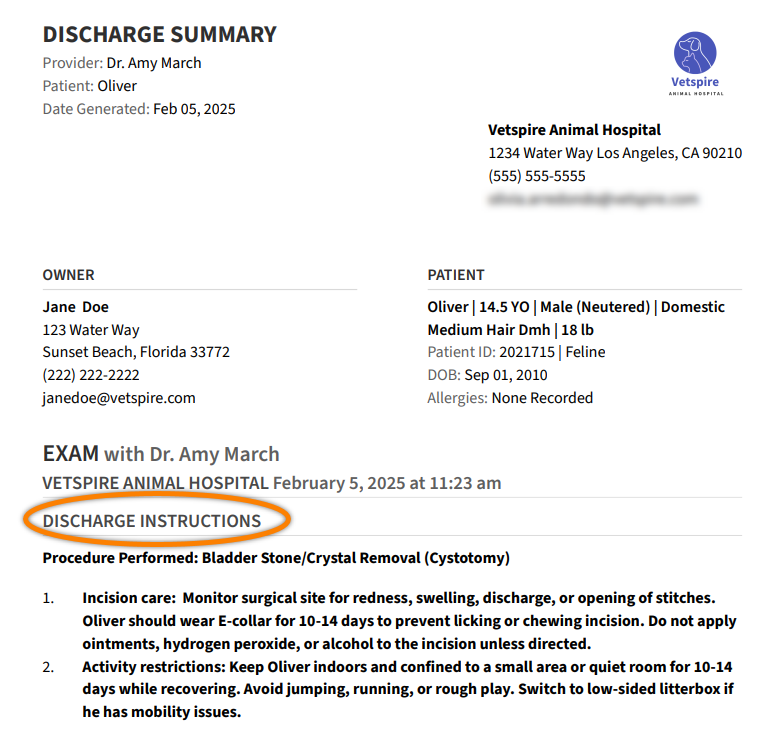
Content entered in the Discharge section displays in the Discharge Summary exported from the Share tab of the encounter footer.
Example PDF:
Attachments
Documents and images added in the Attachments section of the encounter automatically display in Patient Chart > Chart > Uploads. Attachments also display in encounter PDFs.
If you manually upload a file in Patient Chart > Chart > Uploads, you cannot link the file to an open encounter.
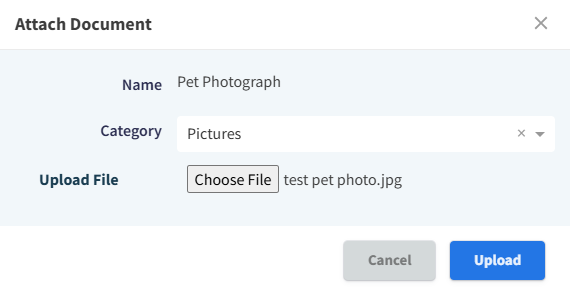
Select Upload Attachment to open the Attach Document window:
Enter the file Name. This is the name that displays in the Uploads section of Patient Chart.
Select the file Category. This helps the system correctly organize and identify files by data type.
Select Choose File, then select the attachment from your file explorer.
Select Upload.
Example:
Client Consents (Consent Forms)
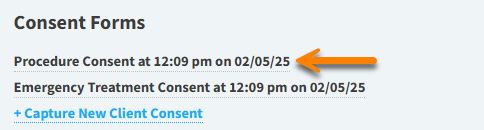
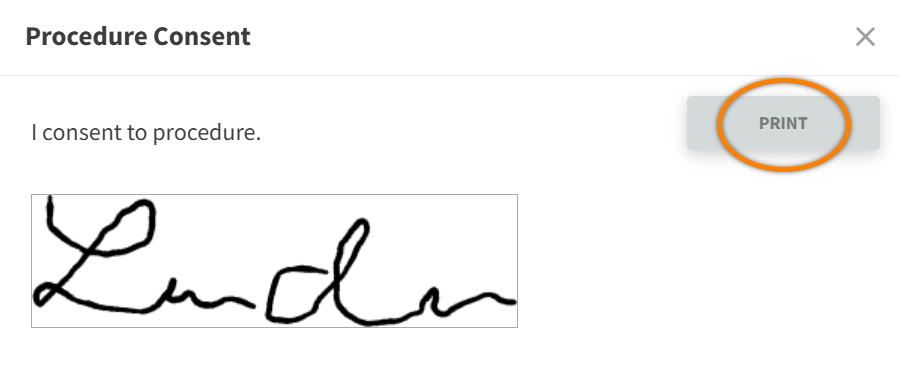
The Consent Forms section displays all signed consent forms that have been sent to the client for this encounter. To print a copy of a signed form, select the form and then select Print.
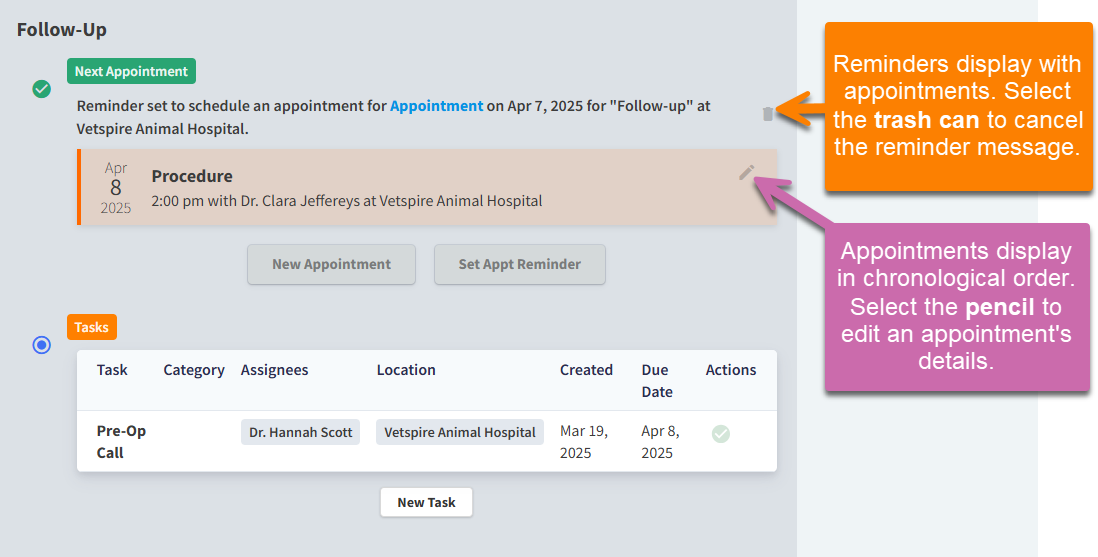
Follow Up
You can schedule or set reminders for future visits in the Follow-Up section:
Select New Appointment to open the Appointment window and schedule the patient’s next visit. The scheduling workflow is the same as if you are scheduling an appointment from Patient Chart.
Select Set Appt Reminder to schedule a reminder message to the client (sent via email or text).
Select New Task to assign a task to a clinic staff member. The workflow to create a task is the same as if you are using the Tasks tool in Global Navigation. This is useful for scheduling follow-up calls with clients.
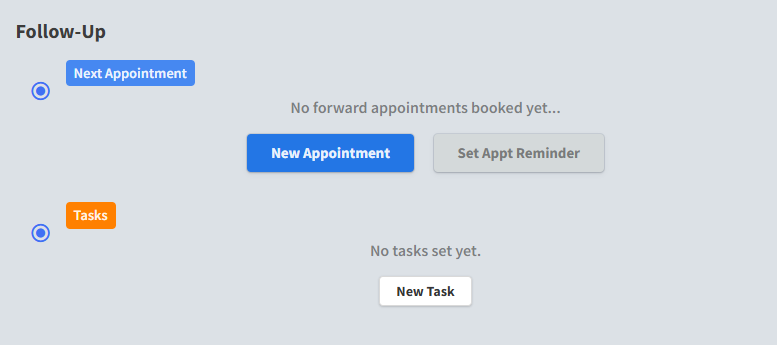
To edit or cancel a New Appointment scheduled in this section, select the pencil icon.
To cancel an Appointment Reminder, select the trash can icon.