About Encounters
An encounter in Vetspire is a record of an interaction with a client and patient. Encounters are used for exams, surgeries, technician appointments, medication pick-ups, client communications, and more. An encounter and its components (medication orders, lab orders, immunizations, notes, attachments, etc.) are all part of a patient’s medical record.
Each encounter is generated using an encounter type that determines the types and categories of data that can be recorded in the encounter. Your Vetspire account comes with preconfigured encounter types.
Encounter types are managed by Vetspire. Submit a ticket to request a new encounter type for your practice.
Each encounter is generated using an encounter type. An encounter type is a template that includes customizable sections for entering different types and categories of data, such as vitals, diagnostics, or follow-up instructions.
Go to More > Admin > Configure > Encounter Types to build an encounter template.
Is an encounter the same as an appointment?
All appointments in Vetspire are encounters, but there are other types of encounters that are not appointments.
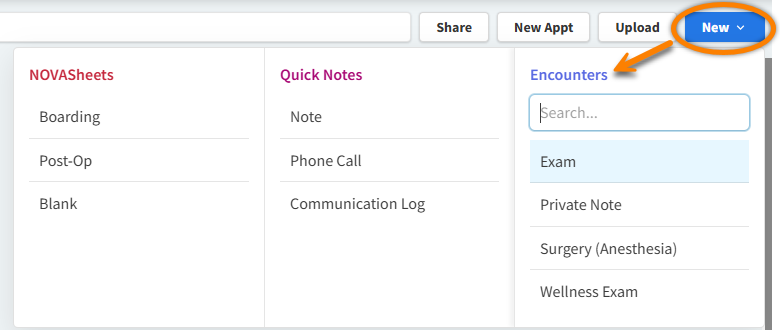
Encounters related to appointments are created in Schedule or Flow.
All other encounter types are created in Patient Chart by selecting the New button.
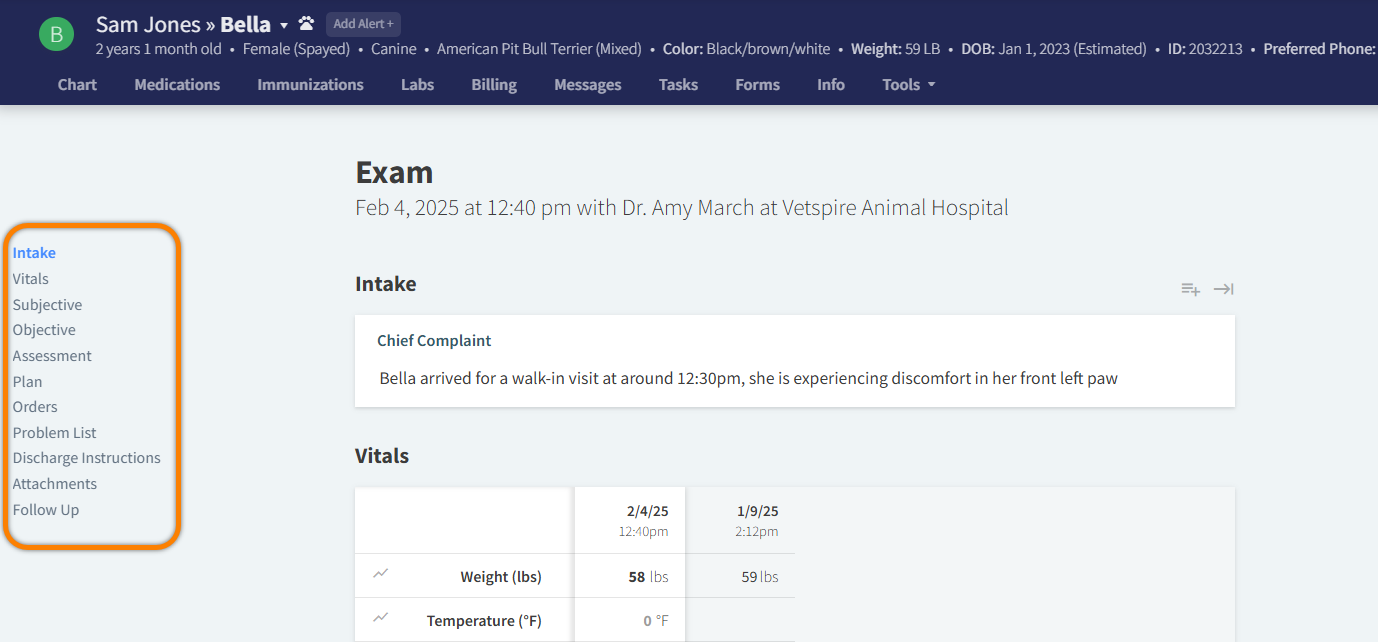
Use the table of contents in the left panel to navigate through the different sections of the encounter. The sections are determined by the encounter type.
Encounter Action Buttons
Some encounter sections have additional actions in the upper right corner.

The following table describes the available actions:
Button | Description |
|---|---|
Add New Sections | Select to add an embeddable encounter template as a new section in the encounter. |
Copy from Previous Record | Import data from the corresponding section of the patient’s previous encounter. This is useful for quickly referencing details of a patient’s last exam and comparing changes in your findings. |
Print Label | Print a kennel label that displays the information recorded in the section. |
Mark All Normal | Answer all “Normal/Abnormal” data fields in a section as Normal. |
Mark All Not Examined | Answer all data fields in a section as Not Examined. |
Add Note | Select to add a note within a data field or section. |
Copy Medications | Select to list all active medications and instructions for each. |

Encounter Footer
The encounter footer displays for all encounter types.

General: The first footer tab displays key details of the encounter, including the assigned provider and technician, location, and date. Learn more about assigning an encounter.
Consent Forms: Displays all consent forms that have been sent for this encounter, the form status (Signed or Unsigned), and the signature date and time. From this tab, you can email, text, or print a new consent form.
Estimates: Create and download estimates, convert estimates to invoices, and take deposits.
Invoice: View, finalize, and collect payment for the invoice of the encounter.
Share: Email a PDF copy of the entire encounter, discharge instructions, or referral letter to the client, rDVM, or other recipients.
Sign: Once an encounter is complete, it must be signed by a DVM or the assigned technician or customer service representative. Signing an encounter means that all of the information it contains is complete and accurate.
Tips for Encounters
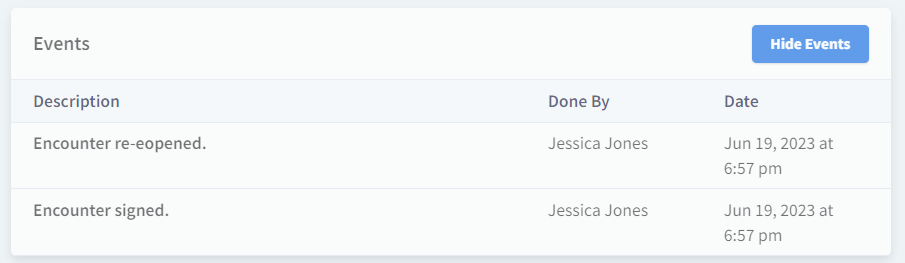
Events Log
An Events section displays at the bottom of each encounter window. Select Show Current Events to view a log of when the encounter is signed (closed) and re-opened and when encounter PDFs are shared via email.
Font Shortcuts
Keyboard shortcuts for font styling are supported in encounters.
Windows OS:
Bold text: Ctrl + B
Underline text: Ctrl + U
Italicize text: Ctrl + i
Bulleted list: Enter - or Shift + 8, then press the spacebar.
Numbered list: Enter 1. and the sequence will follow, or Ctrl + Shift + 7.
Mac OS:
Bold text: Command + B
Underline text: Command + U
Italicize text: Command + i
Bulleted list: Option + 8
Numbered list: Enter a letter or number followed by a period and a space.
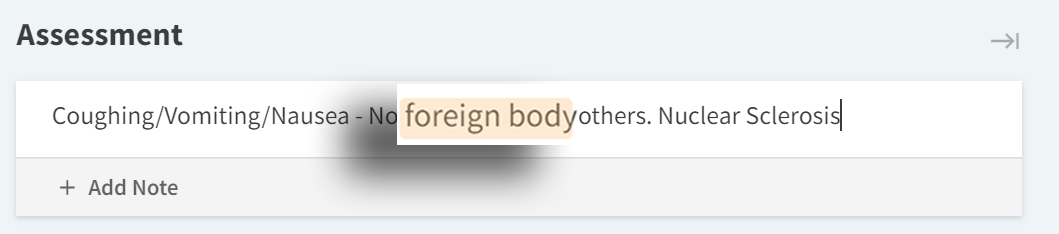
Highlight Symptoms, Diagnoses, and Procedures
When “Disable Text Highlighting” is toggled off in More > Admin > Preferences, the system will automatically highlight keywords in encounter text boxes related to a symptom, diagnosis, or procedure. This setting helps ensure that your staff see notable medical information in the encounter notes.
<need to replace below image>