Schedule
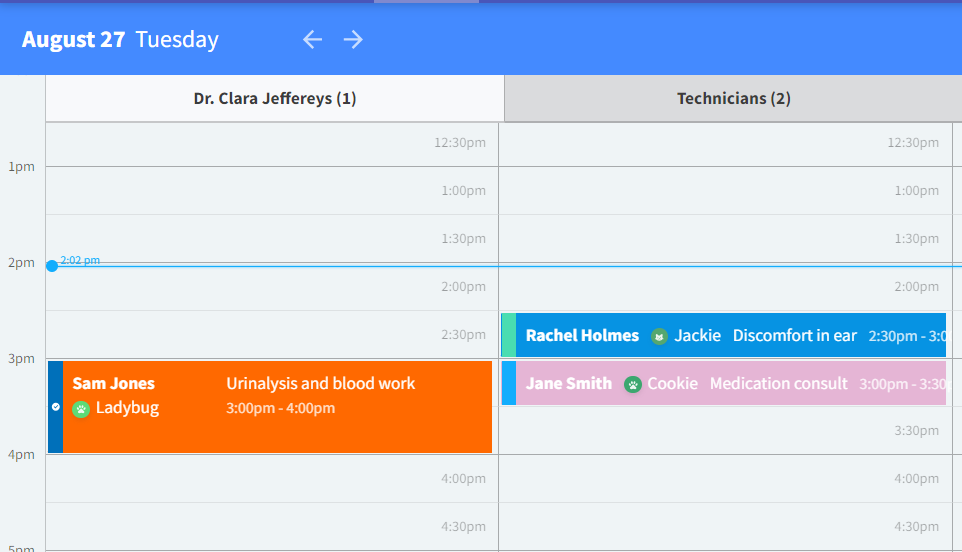
The schedule lists patients scheduled for the day in order of appointment time.
The Schedule components consist of the following.
Use the Schedule to create or see:
Schedule Color Coding
Appointment types can be differentiated on the schedule by color and managed/edited by the Admin. The color bar to the left of the appointment indicates where a patient is in the appointment process. Click to edit the appointment status.
Pink – No Show. Based on the preference settings in Admin, the appointment may be deleted from the schedule and will show in the deletion when marked as a No Show.

White – Day Care

STATUSES MAY EASILY BE CHANGED BY MISTAKE IF CLICKED.
TO REVERT THE STATUS, EDIT THE APPOINTMENT.
This is a permissions-based feature or is managed in your organization’s Admin settings.
Appointment Details
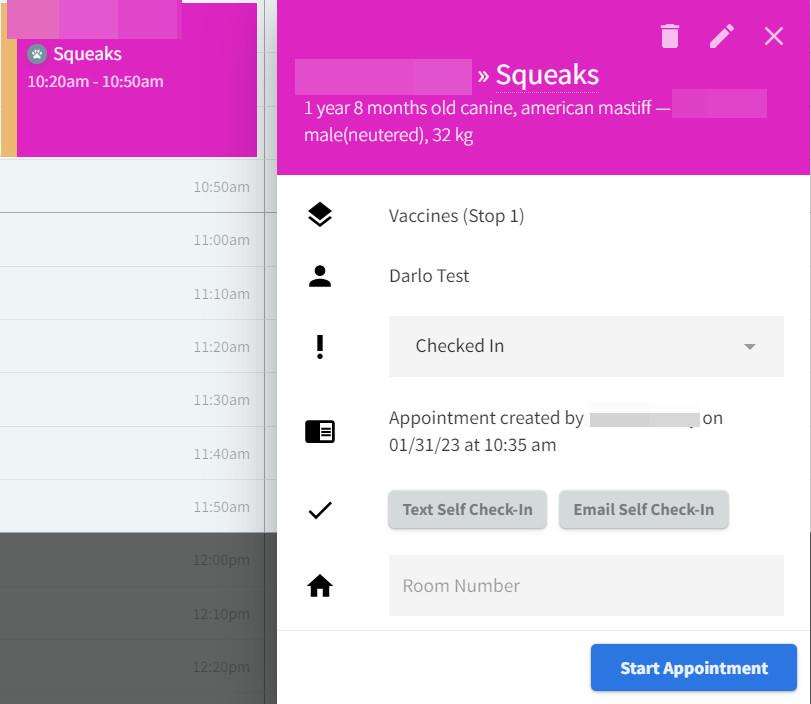
Click on an entry in the schedule to open details about the appointment.
A toolbar becomes available in the upper right-hand corner:
![]()
| Delete appointment | See the Deletion Log for details on the deleted appointment. |
| Update appointment | Select Update, then View History to see a changelog/appointment history. |
| Exit |
Client and Patient Information
Select the Client or the Patient name to navigate the appropriate information screen. The patient weight and breed are listed on the appointment overview pop-up on the schedule.

| Appointment Type |
| Assigned Provider |
| Reason for Visit |
| Appointment Status
|
| While in View mode: see the scheduling details for who created the initial appointment and when While in Edit mode: Assign a customized column |
| Options for sending the Self-Check In and Self-Check In Status |
| Room Number |
 | Start Appointment or Go to Encounter Button |
Appointment Notes | Once the edit button is selected, enter any note related to the appointment. These notes will be reflected in the Change and the appointment History. |

